Ubuntu Virtual Machines on VMware and Multipathd syslog messages

Everynow and then you might install a Ubuntu or Debian machine and get multipath daemon pushed along the way.

Multipathd is used in environments where a disk may have one or more paths to it. Think of isci/fiber/SAN etc. If one path drops, it still might be available on the others.

However, in an environment with Virtual Disks this isn’t useful. And your syslog might get spammed with entries like the ones below, at least my syslog did.

multipathd[651]: sda: add missing path
multipathd[651]: sda: failed to get udev uid: Invalid argument
multipathd[651]: sda: failed to get sysfs uid: Invalid argument
multipathd[651]: sda: failed to get sgio uid: No such file or directory
multipathd[651]: sda: add missing path
multipathd[651]: sda: failed to get udev uid: Invalid argument
multipathd[651]: sda: failed to get sysfs uid: Invalid argument
multipathd[651]: sda: failed to get sgio uid: No such file or directory

There is a simple resolution to this issue.
Modify your multipath daemon config. Open the file /etc/multipath.conf in your favorite texteditor and ensure it looks like the following:

defaults {
    user_friendly_names yes
}

blacklist {
    device {
        vendor "VMware"
        product "Virtual disk"
    }
}

Now restart your multipath-tools service

/etc/init.d/multipath-tools restart

Your syslog should get less messages that you can’t resolve anyway.

Other options are to turn Multipath complete off with the commands:

systemctl disable multipathd
systemctl stop multipathd

OR you can modify your virtual machine definition in VMware (esx or Workstation) by adding the following to the .vmx file:

disk.EnableUUID = "TRUE"

How to remove Microsoft Edge from a system level in Windows 10

The quick way would be:

  • Navigate to C: Program Files (x86) Microsoft Edge Application
  • Select the current version number
  • Locate setup.exe
  • Navigate to the file path within Command Prompt
  • Execute the following command: setup.exe –uninstall –system-level –verbose-logging — force-uninstall

For the whole story read : https://www.express.co.uk/life-style/science-technology/1320416/Microsoft-Block-Windows-10-Users-Remove-Google-Chrome-Rival-Edge

Converting DIG output to JSON

DIG is one powerful tool, mostly used to troubleshoot DNS queries.

However, sometime we want to achieve a task in another field of expertise and collect dns data. For example when one needs to limit access to content which is hosted on different servers from time to time but we can’t utilize FQDN in our firewall rulebase because the reverse dns isn’t acurate.

Now with DIG we can collect the ip addresses that is returned from a DNS request. For example for google.com.

martijn@monitoring:~$ dig google.com

; <<>> DiG 9.9.5-9+deb8u17-Debian <<>> google.com
;; global options: +cmd
;; Got answer:
;; ->>HEADER<<- opcode: QUERY, status: NOERROR, id: 16736
;; flags: qr rd ra; QUERY: 1, ANSWER: 1, AUTHORITY: 0, ADDITIONAL: 1

;; OPT PSEUDOSECTION:
; EDNS: version: 0, flags:; udp: 4096
;; QUESTION SECTION:
;google.com.                    IN      A

;; ANSWER SECTION:
google.com.             36      IN      A       172.217.17.78

;; Query time: 1 msec
;; SERVER: 195.8.195.8#53(195.8.195.8)
;; WHEN: Tue Mar 10 10:38:02 CET 2020
;; MSG SIZE  rcvd: 55

martijn@monitoring:~$

But manually scraping the default output and maintaining a list is time consuming. We can make the output cleaner by adding some additional parameters. For example the following command:

martijn@monitoring:~$ dig google.com +nocomments +noquestion +noauthority +noadditional +nostats

; <<>> DiG 9.9.5-9+deb8u17-Debian <<>> google.com +nocomments +noquestion +noauthority +noadditional +nostats
;; global options: +cmd
google.com.             288     IN      A       172.217.168.238
martijn@monitoring:~$

While this is already much cleaner, we still would have to manually process this output, or perform some screen scraping to continue with the output. We can however pipe the output of dig through the powerful awk command and skip the first three lines.

martijn@monitoring:~$ dig aaaa google.com +nocomments +noquestion +noauthority +noadditional +nostats  | awk '{if (NR>3){print}}'
google.com.             53      IN      AAAA    2a00:1450:400e:80d::200e
martijn@monitoring:~$

And to be honest, yes, we could skip the first three lines with any other tool that provides these capabilities, but awk seems to be generally available. Now we only have the actual results of the query it is safe to continue with the data.

DNS data always consists of a fixed structure.

Query                  TTL      CLASS   TYPE    Content 
google.com.             53      IN      AAAA    2a00:1450:400e:80d::200e 

In my case i have a need to process this data in a structured way, and i am able to process either JSON or XML. for this example i will convert the structured data to JSON. Because the content is already by default separated by tabs we can pull the data through jq. However, we need to keep in mind that sometimes there are multiple tabs. So we need to squeeze them in to one.

martijn@monitoring:~$ dig aaaa google.com +nocomments +noquestion +noauthority +noadditional +nostats  | awk '{if (NR>3){print}}' | tr -s '\t' | jq -R 'split("\t") |{Name:.[0],TTL:.[1],Class:.[2],Type:.[3],IpAddress:.[4]}'
{
  "Name": "google.com.",
  "TTL": "76",
  "Class": "IN",
  "Type": "AAAA",
  "IpAddress": "2a00:1450:400e:80e::200e"
}
martijn@monitoring:~$

The output we have now seems to be valid JSON, however testing this further with dns queries returning multiple addresses will return slightly invalid JSON. An good example would be when we query the microsoft.com domain.

martijn@monitoring:~$ dig a microsoft.com +nocomments +noquestion +noauthority +noadditional +nostats  | awk '{if (NR>3){print}}'| tr -s '\t' |  jq -R 'split("\t")
 |{Name:.[0],TTL:.[1],Class:.[2],Type:.[3],IpAddress:.[4]}'
 {
   "Name": "microsoft.com.",
   "TTL": "3600",
   "Class": "IN",
   "Type": "A",
   "IpAddress": "104.215.148.63"
 }
 {
   "Name": "microsoft.com.",
   "TTL": "3600",
   "Class": "IN",
   "Type": "A",
   "IpAddress": "13.77.161.179"
 }
 {
   "Name": "microsoft.com.",
   "TTL": "3600",
   "Class": "IN",
   "Type": "A",
   "IpAddress": "40.76.4.15"
 }
 {
   "Name": "microsoft.com.",
   "TTL": "3600",
   "Class": "IN",
   "Type": "A",
   "IpAddress": "40.112.72.205"
 }
 {
   "Name": "microsoft.com.",
   "TTL": "3600",
   "Class": "IN",
   "Type": "A",
   "IpAddress": "40.113.200.201"
 }
 martijn@monitoring:~$

As already stated, the output isn’t yet valid JSON, we need to slurp it once more through the jq tooling.

 martijn@monitoring:~$ dig a microsoft.com +nocomments +noquestion +noauthority +noadditional +nostats  | awk '{if (NR>3){print}}'| tr -s '\t' | jq -R 'split("\t") |{Name:.[0],TTL:.[1],Class:.[2],Type:.[3],IpAddress:.[4]}' | jq --slurp .
 [
   {
     "Name": "microsoft.com.",
     "TTL": "3256",
     "Class": "IN",
     "Type": "A",
     "IpAddress": "104.215.148.63"
   },
   {
     "Name": "microsoft.com.",
     "TTL": "3256",
     "Class": "IN",
     "Type": "A",
     "IpAddress": "13.77.161.179"
   },
   {
     "Name": "microsoft.com.",
     "TTL": "3256",
     "Class": "IN",
     "Type": "A",
     "IpAddress": "40.76.4.15"
   },
   {
     "Name": "microsoft.com.",
     "TTL": "3256",
     "Class": "IN",
     "Type": "A",
     "IpAddress": "40.112.72.205"
   },
   {
     "Name": "microsoft.com.",
     "TTL": "3256",
     "Class": "IN",
     "Type": "A",
     "IpAddress": "40.113.200.201"
   }
 ]
 martijn@monitoring:~$

So, basically, to get the result of dig in an json valid output you could create one call in your bash script to

#!/bin/bash
recordtype="A"
fqdn="microsoft.com"
digjson=$( dig $recordtype $fqdn +nocomments +noquestion +noauthority +noadditional +nostats  | awk '{if (NR>3){print}}'| tr -s '\t' | jq -R 'split("\t") |{Name:.[0],TTL:.[1],Class:.[2],Type:.[3],IpAddress:.[4]}' | jq --slurp . )

Feel free to query your own domainname or specific record and adjust the recordtype, preferably by setting the variables.

Installing PECL Extensions for PHP on a DirectAdmin server

It has been a while since i installed several PECL Extensions for PHP, especially on a DirectAdmin server, so i did some quick searches and came up with the following commands:

export PHP_VER=72
export PECL_EXTENSION=yaml

cd /usr/local/src
/usr/local/php${PHP_VER}/bin/pecl channel-update pecl.php.net
/usr/local/php${PHP_VER}/bin/pecl download ${PECL_EXTENSION}
tar zxf ${PECL_EXTENSION}-*.tgz && cd ${PECL_EXTENSION}-*/
/usr/local/php${PHP_VER}/bin/phpize
./configure --with-php-config=/usr/local/php${PHP_VER}/bin/php-config

make && make install
echo "extension=${PECL_EXTENSION}.so" >> /usr/local/php${PHP_VER}/lib/php.conf.d/90-custom.ini
systemctl restart httpd && systemctl restart php-fpm${PHP_VER}

unset PHP_VER
unset PECL_EXTENSION

First of all it is important to have all requirements installed for the PECL Extensions, if not the configure or the make command will fail.

Now let’s take a look at these commands line by line.

export PHP_VER=72

This will set an environment variable with the value “72”, this matches with the versioning that DirectAdmin and Custombuild use.

export PECL_EXTENSION=yaml

Setting another environment variable, this time with the PECL Extension name.

These two variables are referenced in the following commands, just to make them reusable.

cd /usr/local/src

This one, i really hope, should not need any explanation. We are changing directories…

/usr/local/php${PHP_VER}/bin/pecl channel-update pecl.php.net

We are executing the pecl command for the desired PHP instance and update the channel data. Just to make sure we are aware of the latest versions available.

/usr/local/php${PHP_VER}/bin/pecl download ${PECL_EXTENSION}

Let’s download the extension that we mentioned earlier in the environment variable.
It will be downloaded into /usr/local/src

tar zxf ${PECL_EXTENSION}-*.tgz && cd ${PECL_EXTENSION}-*/

Now the PECL extension has been downloaded, we can unpack it. Sometimes you see references with the ‘v’ option enabled for the tar command. I don’t think we need any verbose output while unpacking.

After unpacking immediately change directory towards the just extracted PECL extension.

/usr/local/php${PHP_VER}/bin/phpize

Now let’s prepare the extension with running phpize for the files in the current directory.

./configure --with-php-config=/usr/local/php${PHP_VER}/bin/php-config

Let us run the configuration and preparation scripts. Just be carefull and watch the output.

If anything fails, you haven’t met the requirements for the PECL Extension you are installing. You will have to solve them before continuing the commands.

make && make install

So the configure went successful and you executed the make and make install commands. The PECL Extension will be compiled against your system. And afterwards installed in the right directory for your DirectAdmin server and PHP version.

echo "extension=${PECL_EXTENSION}.so" >> /usr/local/php${PHP_VER}/lib/php.conf.d/90-custom.ini

This will insert a value at the end of the 90-custom.ini file in the PHP Configuration directory. It will tell PHP to load the just combiled and installed PECL Extension.

systemctl restart httpd && systemctl restart php-fpm${PHP_VER}

This will reload both httpd as your php-fpm services.

httpd is the default service name for your Apache service on a DirectAdmin server; also the default PHP installation method is PHP-FPM so hence we are restarting that aswell.

If you are however using Nginx or any other webserver you will have to restart that by hand now. The same applies if you are running PHP in a different way than PHP-FPM.

unset PHP_VER
unset PECL_EXTENSION

Finally we unset both environment variables. No need to maintain them as we are done.

You might want to have a look at the PHPINFO() output (or php -m) for the PECL Extension to be loaded.

Pursuing the Cisco Certified Network Professional Voice certification? Update your path!

Whenever you are pursuing a Cisco Certified Network Professional certification in the Voice section, you should update your certification path. As of augusth 15th you will nolonger be able to obtain your CCNP Voice certification. Even if you still have to achieve your CCNP Voice, i would recommend you to update your certification path and obtain the brand new Cisco Certified Network Professional Collaboration certification.

The new CCNP Collaboration exam consist for a large part of the existing CCNP Voice materials, but has some updated exams on Video topics. Also it consists out of less exams to take. So on a financial base it would even save you money.

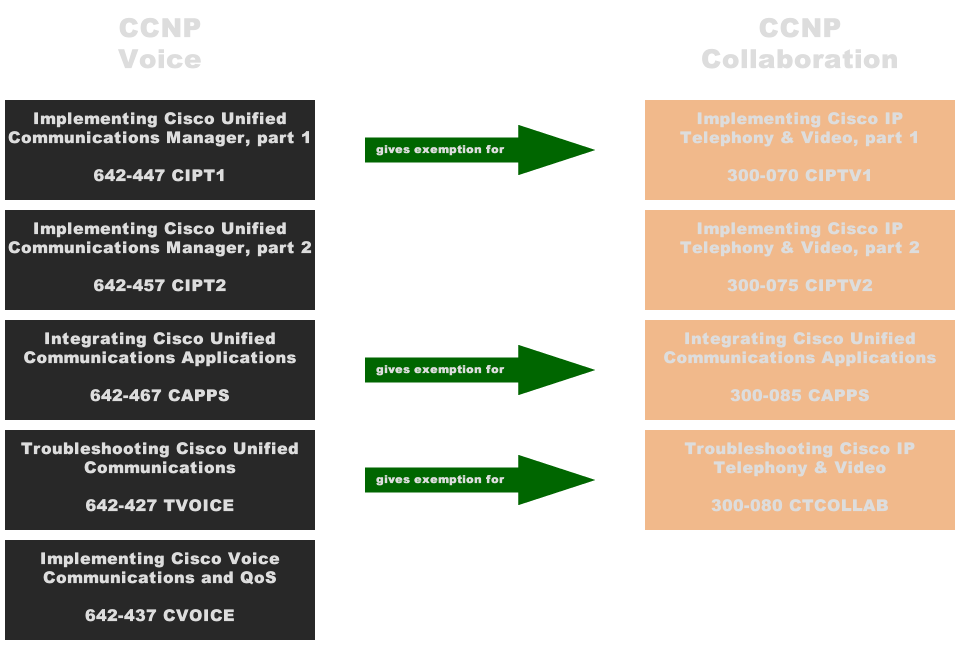
So what changed, for a beginning you are no longer required to take and pass the CVOICE exam. The CIPT1, CAPPS and TVOICE exams will give some eemptions for the new CCNP Collaboration certification. So if you already did one or more exams have a look at the CCNP Collaboration Exam Migration Tool.

Have a look at the migration scheme.

CCNP Collaboration

If you are already CCNP Voice, take the new CIPTV2 exam and upgrade your certification to CCNP Collaboration.

Een nieuw jaar, een nieuwe certificering?

We hebben nog een paar dagen te gaan in 2013 en dat houdt in dat de meeste mensen nadenken over wat ze in het nieuwe jaar willen bereiken.

Goede voornemens noemen we ze meestal, maar ook carriere paden worden regelmatig onder de loop genomen.

Zelf heb ik al een tijd geleden opgeschreven wat ik graag zou willen, maar ben daar niet geheel aan toe gekomen. Het studieboek en bijbehorende instructie dvd liggen bijvoorbeeld al 4 maanden in huis. Met de start van 2014 wil ik mij graag gaan focussen op het behalen van mijn CCNA Voice certificering. Het verlengd namelijk mijn CCNA dat ik begin 2012 heb behaald. Daarnaast komt het goed van pas in mijn werk.

Een deadline is ook gesteld, al is het maar om mijn CCNA niet te laten verlopen, eind 2014.

Ik weet dat CCNA een zware beproeving was door de breedheid van de materie. Naast CCIE examens schijnt dit een van de lastigste te zijn. CCNA Voice is daarentegen specifiek op spraak gericht. Echter dit is een oude en complexe materie waar veel verschillende implementatie mogelijkheden voor zijn. Of dit een makkelijke certificering gaat worden valt nog maar te bezien.
image

Albert Heijn pickup point, niet zo snel als verwacht…

Vandaag, 27 juli, vieren we met familie en vrienden dat ik er weer een jaar bij heb mogen tellen.

Met de komst van onze kleine leek het verstandig om de spullen via het pick-up point op te halen. Zodoende staan we nu bij het pick-up point, maar niet al onze spullen zijn er. Nu maar hopen dat ze er zo zijn.

Na circa 30 minuten gewacht te hebben, kwam daar de bestelwagen van Albert aan. Ze kwamen de ontbrekende gekoelde spullen brengen, zodat samen met mij 5 partijen zeer gelukkig hun boodschappen in ontvangst konden nemen.

Als de gekoelde boodschappen voorhanden waren geweest, was het winkelen via Appie stukken sneller geweest, jammer dat dit fout is gelopen. Volgende keer meer geluk?

Het genot van thuiswerken

Iedereen heeft er wel eens van gehoord. Mensen die thuiswerken of werken conform ‘het nieuwe werken’.

Niet voor iedereen weg gelegd en vereist een zekere discipline. Zeker als je van uit huis werkt.

Tussen twee locatie bezoeken vandaag had ik de mogelijkheid om in de tuin mijn email bij te werken.

image

Ook weleens een keer lekker!

I’m with stupid -> Spammer met niet werkende linkjes…

Soms vraag je jezelf af, waarom al die bergen spam worden verstuurd.

Menig partij investeert in een goede oplossing om al die onzin buiten de deur te houden. Echter eens in de zoveel tijd schiet een spam-email wel eens door het filter heen.

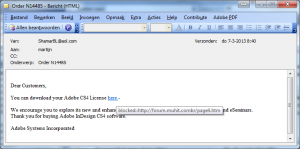
Zo ook vandaag, een email dat ik Adobe CS4 zou hebben aangekocht.

Maar als je dan echt mensen naar je malware wilt trekken. Zorg dan dat het linkje werkt… 😉

Setting environment variables for your Magento store through .htaccess

Once in a while i get the question, Martijn how can we select a storeview without editting the index.php file, as Magento is prepared for this?!

Well, the Magento index.php file is indeed prepared for this. The full Magento index.php for releases 1.4.2.0 and later is as below.

<?php
/**
* Magento
*
* NOTICE OF LICENSE
*
* This source file is subject to the Open Software License (OSL 3.0)
* that is bundled with this package in the file LICENSE.txt.
* It is also available through the world-wide-web at this URL:
* http://opensource.org/licenses/osl-3.0.php
* If you did not receive a copy of the license and are unable to
* obtain it through the world-wide-web, please send an email
* to license@magentocommerce.com so we can send you a copy immediately.
*
* DISCLAIMER
*
* Do not edit or add to this file if you wish to upgrade Magento to newer
* versions in the future. If you wish to customize Magento for your
* needs please refer to http://www.magentocommerce.com for more information.
*
* @category   Mage
* @package    Mage
* @copyright  Copyright (c) 2008 Irubin Consulting Inc. DBA Varien (http://www.varien.com)
* @license    http://opensource.org/licenses/osl-3.0.php  Open Software License (OSL 3.0)
*/

if (version_compare(phpversion(), '5.2.0', '<')===true) {
    echo  '<div style="font:12px/1.35em arial, helvetica, sans-serif;"><div style="margin:0 0 25px 0; border-bottom:1px solid #ccc;"><h3 style="margin:0; font-size:1.7em; font-weight:normal; text-transform:none; text-align:left; color:#2f2f2f;">Whoops, it looks like you have an invalid PHP version.</h3></div><p>Magento supports PHP 5.2.0 or newer. <a href="http://www.magentocommerce.com/install" target="">Find out</a> how to install</a> Magento using PHP-CGI as a work-around.</p></div>';
    exit;
}

/**
* Error reporting
*/
error_reporting(E_ALL | E_STRICT);

/**
* Compilation includes configuration file
*/
$compilerConfig = 'includes/config.php';
if (file_exists($compilerConfig)) {
    include $compilerConfig;
}

$mageFilename = 'app/Mage.php';
$maintenanceFile = 'maintenance.flag';

if (!file_exists($mageFilename)) {
    if (is_dir('downloader')) {
        header("Location: downloader");
    } else {
        echo $mageFilename." was not found";
    }
    exit;
}

if (file_exists($maintenanceFile)) {
    include_once dirname(__FILE__) . '/errors/503.php';
    exit;
}

require_once $mageFilename;

#Varien_Profiler::enable();

if (isset($_SERVER['MAGE_IS_DEVELOPER_MODE'])) {
    Mage::setIsDeveloperMode(true);
}

#ini_set('display_errors', 1);

umask(0);

/* Store or website code */
$mageRunCode = isset($_SERVER['MAGE_RUN_CODE']) ? $_SERVER['MAGE_RUN_CODE'] : '';

/* Run store or run website */
$mageRunType = isset($_SERVER['MAGE_RUN_TYPE']) ? $_SERVER['MAGE_RUN_TYPE'] : 'store';

Mage::run($mageRunCode, $mageRunType);

On lines 66 you will find a conditional test that would allow you to turn on the Magento Developer-mode. On lines 75 and 78 you will see how the $mageRunCode and $mageRunType is populated by server values.

All three values can be set from the .htaccess files or vhost configurations of your server with the code below.

### Setting environment variables for your Magento store.
SetEnvIf Remote_Addr "your.ip.address.here" MAGE_IS_DEVELOPER_MODE=TRUE
SetEnvIf Host "your.domain.here" MAGE_RUN_CODE=storeview_code

### Next line is important for multi language stores on the same domain.
### When running multiple languages on one domain, the storeview code is
### stored in the frontend cookie. Without this line, your store would
### default back to the storeview set above
SetEnvIfNoCase ^Cookie$ "frontend=(.+)" MAGE_RUN_CODE=

With the code at line 2, you can turn on the developer mode for only the specified ip address. The code at line 3 allows you to set a specific storeview-code to be used while executing the Magento web-app.

However, setting always a specific storeview-code is a bad idea. In multilingual stores you could make it default back to the default language all the time. Therefor i recommend not to set a storeview if a cookie is set with a frontend-id.

I hope this is useful for all the Magento Developers out there. If you like my articles, please spread the word using the Tweet button or the Facebook-‘Recommend’-button.

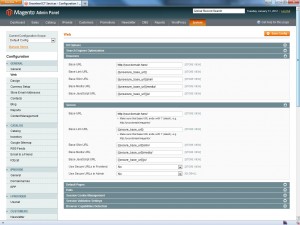
By the way, don’t forget that Magento redirects by default to your base url. So be aware that you need to set this storeview url for a second store in the General Web section of the System config

.